


Porsche 944 / 944 Turbo Fuel Line Replacement
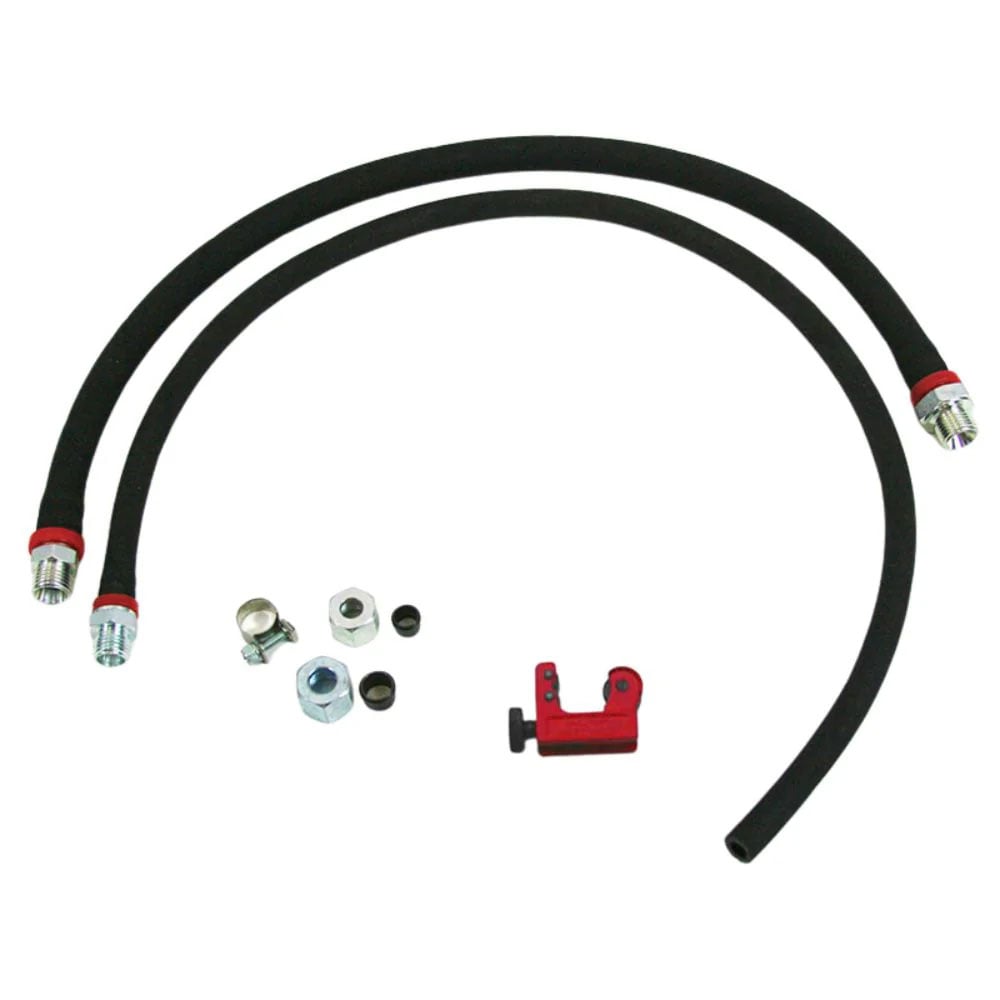
This Porsche 944 fuel line replacement guide explains how to replace the aging rubber fuel hoses under the hood. The example shown here uses the Rennbay fuel line kit pictured below.
This job involves replacing the rubber fuel hoses under the hood by cutting the original factory metal hard tubes in the wheel well and attaching replacement hoses with compression fittings. This avoids the need to remove and replace the entire length of metal tubing running under the car, which is a much more involved and expensive job.
Why Carpokes likes the Rennbay kit.The Rennbay kits use compact custom fittings that fit well in the tight 944 wheel-well and engine-bay areas. Many other kits stack AN fittings, adapters, or multiple couplers in the same area, which can become bulky in a space where clearance is already limited.
Fuel fire and safety warning.The rubber fuel hoses on Porsche 944 models are now decades old and are known to crack and leak with age. Engine bay fuel leaks are one of the most common causes of fire on these cars, so replacing aging rubber fuel hoses is an important safety and reliability repair. It should be considered a must-do maintenance item on any car with original rubber hoses, regardless of miles or apparent condition.
Perform this job only on a cold car that has been sitting overnight. Work in a well-ventilated area away from sparks, heaters, pilot lights, cigarettes, or open flame, and keep a fully charged fire extinguisher nearby at all times. Do not use abrasive cut-off wheels, grinders, saws, or any other cutting method that can create sparks near fuel or fuel vapors. Use the tubing cutter supplied with the kit or another proper non-sparking tubing cutter.
By using this procedure you agree to the Carpokes terms and understand you are proceeding at your own risk with no warranties implied or expressed from Carpokes, its owners, members, or contributing authors.
10-Step Carpokes Summary
-
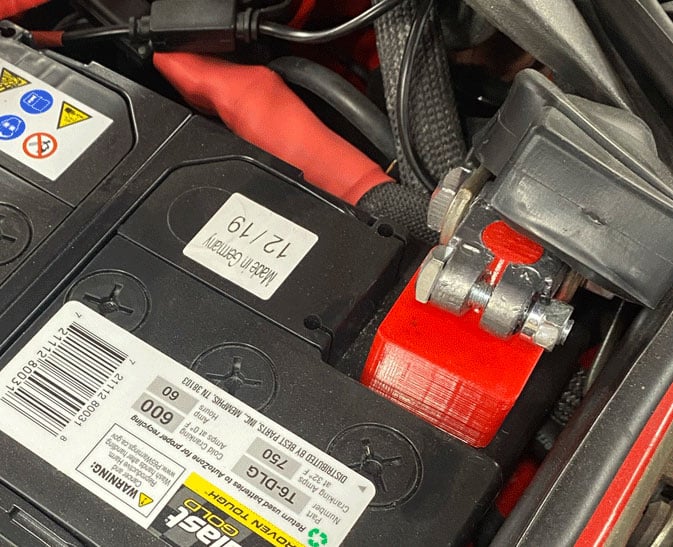
Disconnect the battery.
Remove and isolate the negative battery terminal before relieving fuel pressure or opening the fuel system. A simple battery-post isolator can help keep the cable from accidentally touching the post again and sparking while you are working on the fuel lines. Alternatively, the cable can be temporarily zip tied or otherwise secured to ensure it cannot touch the battery post. Carpokes has a 3D-printable battery isolator file here: battery isolator thread.
-
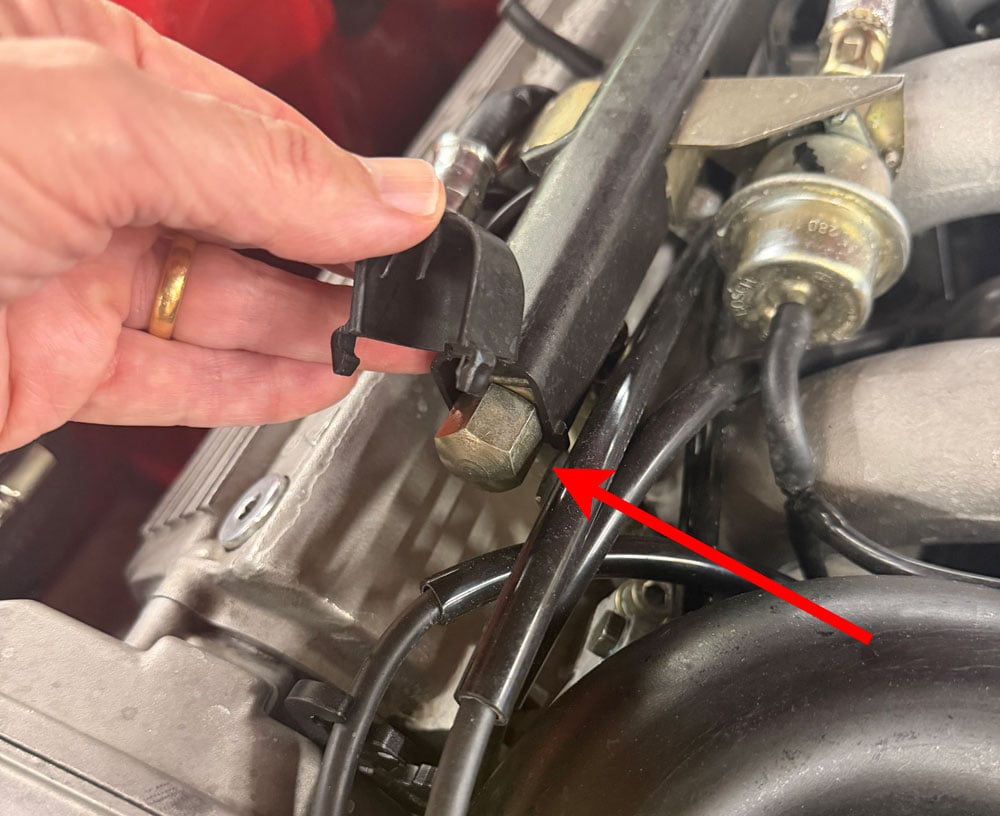
Relieve fuel pressure at the rail.
Wear gloves and eye protection. Use rags around the end of the fuel rail, then slowly loosen the screw-on end cap with a 19mm wrench or socket so the pressure bleeds off in a controlled way. The cap seals with a small ball bearing inside, so take care not to lose it. The lines will still have fuel in them after pressure is relieved.
-
Raise the front of the car safely.
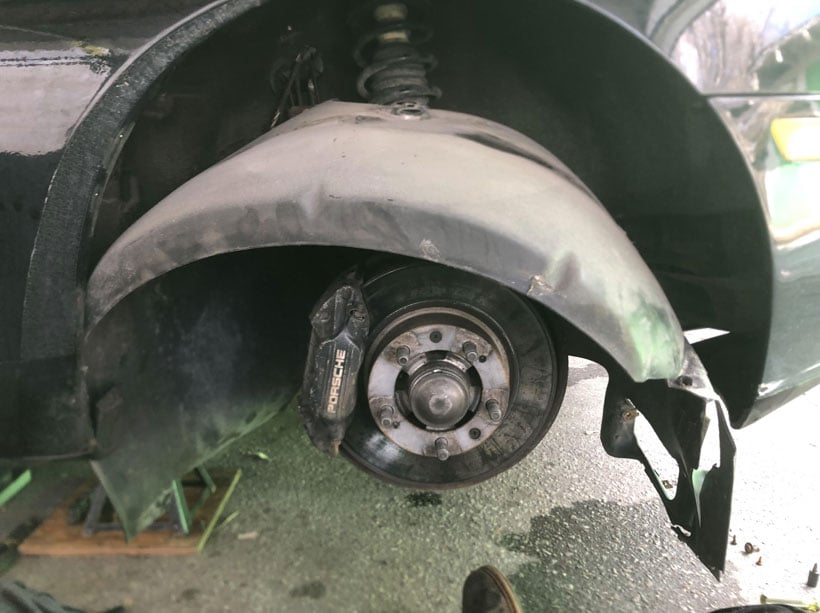
Raise the front of the car and support it securely on jack stands before working underneath or inside the wheel well. Never work on a car supported only by a hydraulic jack. Remove the right-front wheel to access the inner fender liner.
-
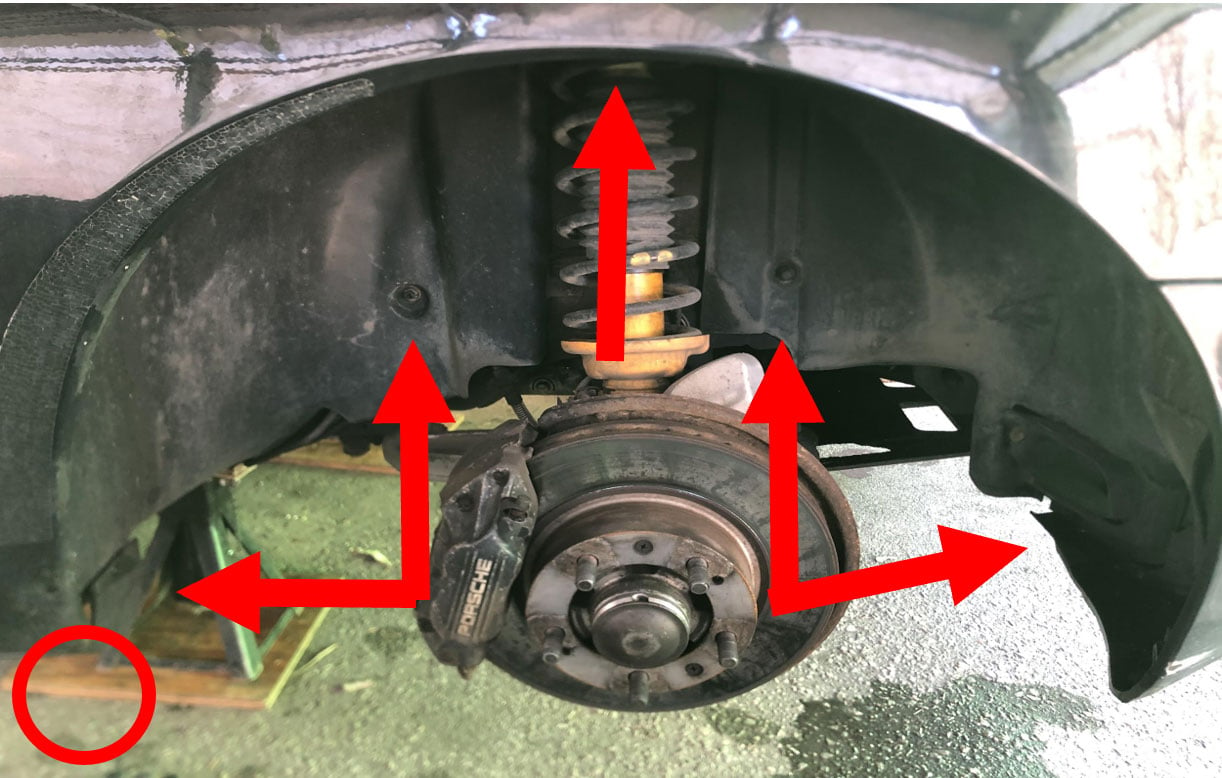
Remove the right-front fender liner.
Remove the screws and fasteners holding the liner in place. Some fasteners may be hidden by dirt, undercoating, or the edge of the liner, so work slowly and avoid tearing the liner. Once the fasteners are removed, flex the liner carefully and pull it out of the wheel well to expose the fuel lines and clamps behind it.
-
Document the original line routing.
Take several pictures before removing anything. Photos of the routing, clamp locations, and wheel-well pass-through area will help during reassembly.
-
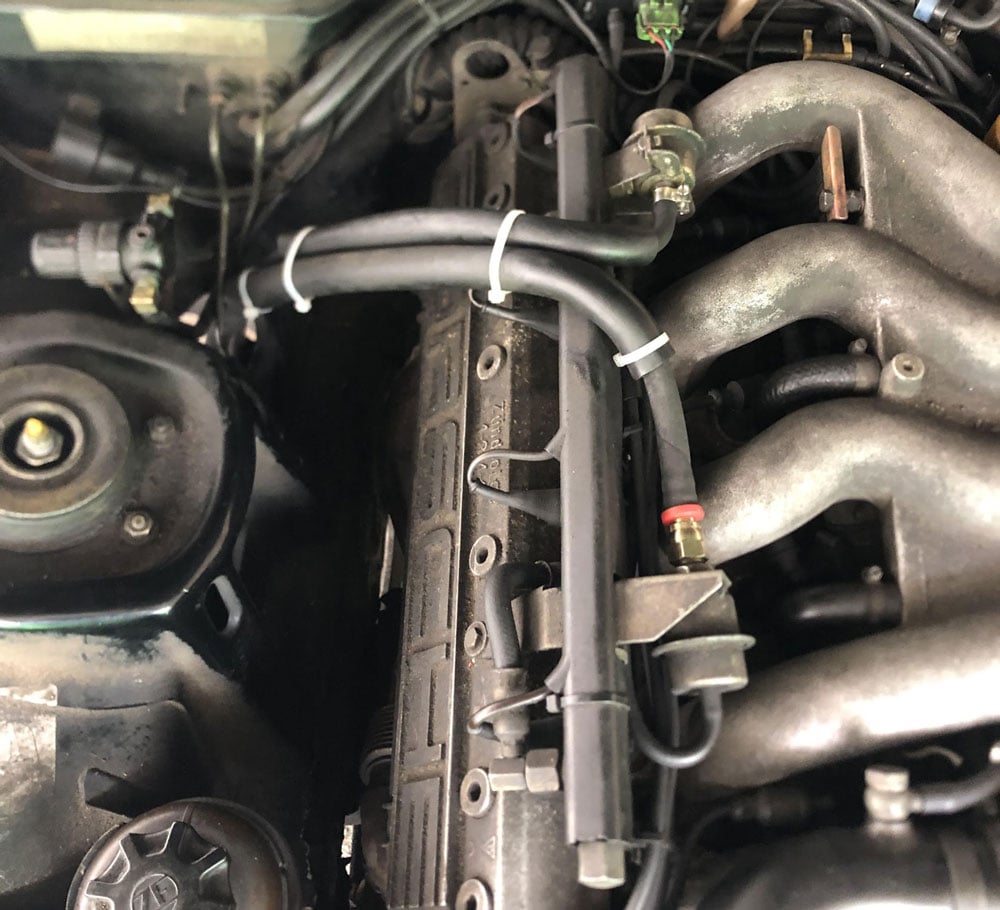
Test-fit, cut, and install the new hoses.
Feed the new hoses into place before cutting anything. This style of kit replaces the rubber hoses under the hood by cutting the original factory metal hard tubes in the wheel well and connecting the new hoses to the remaining hard tubes with compression fittings. Some cars have the upper clamp close to the hole where the hoses pass through the fender, while other cars have that clamp positioned lower. Choose cut locations that allow the new hoses to route naturally, leave room for the compression fittings, and still allow the clamps to secure the lines properly.
The rearmost hose can run over the exhaust as positioned by the factory, or it can be routed toward the firewall to reduce heat exposure. Rennbay offers longer hose kits for firewall-style routing. If that hose is routed toward the firewall, the fuel pressure regulator must be reversed so the hose fitting points toward the firewall.
Do not use anything that can spark when cutting the lines. Use the tubing cutter supplied with the kit, or another proper non-sparking tubing cutter. Cut the original factory metal hard tubes in the wheel well at the planned locations, then install the new hoses with the supplied compression fittings and the clamps that come with the kit.

-
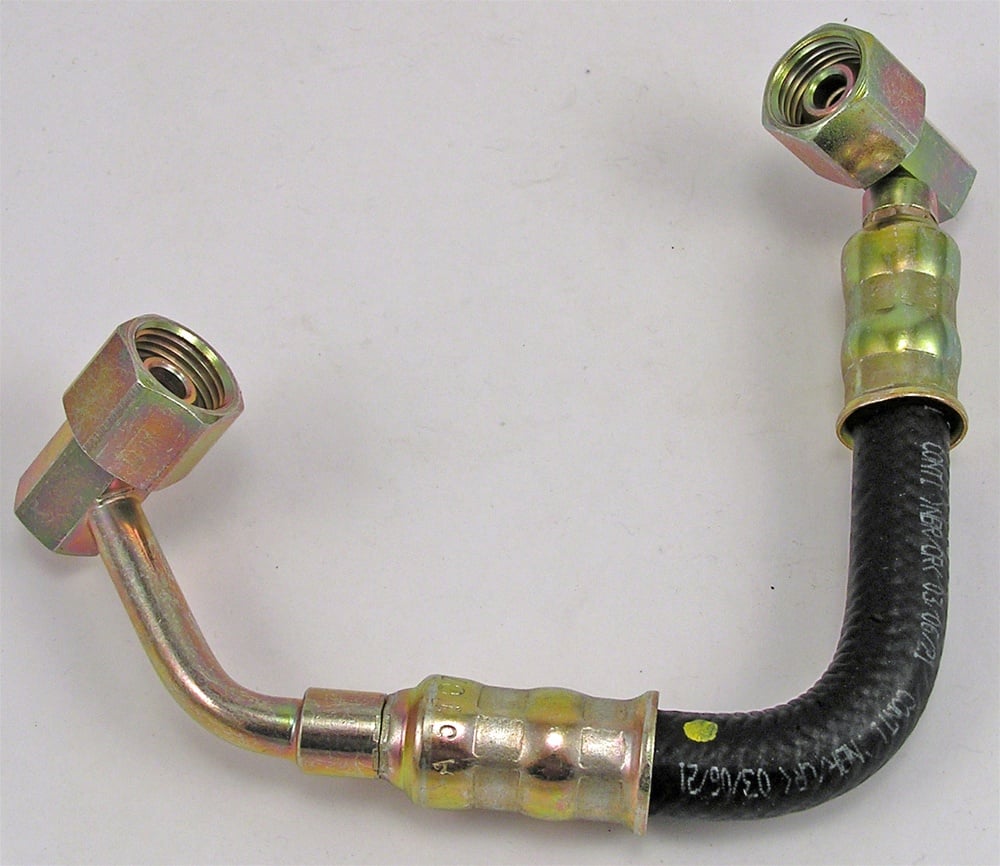
Replace the short jumper hose at the fuel rail.
Replace the short jumper hose between the fuel damper and the fuel rail with a new factory hose, part number 944.110.413.03. The jumper hose is as likely to leak and cause fires as the other under-hood rubber hoses, so replacing it is a necessary part of this job.
-
Pressurize the system and leak-test before reinstalling the liner.
Reconnect the battery. Crank the motor and turn it off as soon as it starts so the lines have pressure, then inspect every fitting closely for leaks or seepage. If there is any sign of wetness, seepage, fuel odor, or leakage, correct the problem before continuing.
-
Drive, recheck, and then reassemble.
Leave the fender liner off for the first short drive so the fittings remain easy to inspect. After the drive, check again for any fuel odor, dampness, seepage, or leaks. Reinstall the fender liner only after you are confident the system is completely dry and leak-free.
-
Follow up after a few days of driving.
After a few days of normal driving, inspect the engine bay and wheel-well area again. Check the hose routing, clamps, compression fittings, jumper hose, and any nearby surfaces for fuel odor, dampness, rubbing, or seepage. Do not ignore even a slight fuel smell.