The project I'm currently working on, 71 911

911, 912, 914, 356 and all other air-cooled cars!
User avatar
Carmagic
Posts: 230
Joined: Sat Dec 17, 2022 1:29 pm
Has thanked: 33 times
Been thanked: 263 times
2 years ago I started on my 71 911. It was my Autocross car for 10 years. But I retired it and it was time resurrect it and built a nice outlaw 911. Here are some pictures when I got started:

Image

Image

Image

Image

Image

Image

Image

Image

Image

Image

More to come
Cheers
Engelbert
LED lights for classic Porsches http://carmagic.us/

#1

User avatar
Carmagic
Posts: 230
Joined: Sat Dec 17, 2022 1:29 pm
Has thanked: 33 times
Been thanked: 263 times
Disassembling continues:

Image

The front wire harness and the fresh air system removed.

Image

Image

Image

The dash pad had a cover, which I left back then, but this time it will be done right.

Image

I just cleaned it up a bit before I'm putting it away.

Image

The gauges are all out, and the wire harness from front is pulled inside.

Image

Image

The doors are all disassembled. Here the locks. I clean stuff up before packing it away. One before the other after cleaning.

Image

The calipers removed.

Image

Next the suspension.

Image

Image

Got more items already cleaned up a bit before put them in storage.

Image

Image

The steering rack is ready to go in storage.

Image

Almost all components removed. This car was disassembled a lot faster then those before, LOL.

Image

Image

To be continued.

Cheers
Engelbert
LED lights for classic Porsches http://carmagic.us/

#2

User avatar
Tom
Site Admin
Posts: 8912
Joined: Fri Jun 25, 2021 2:04 pm
Location: Silicon Valley, CA
Has thanked: 931 times
Been thanked: 3988 times
Contact:
Looking great. I love watching other people work on cars. So much easier than working myself. :lol: :angel: :lol:

What's the end-game for that car?

#3

User avatar
Carmagic
Posts: 230
Joined: Sat Dec 17, 2022 1:29 pm
Has thanked: 33 times
Been thanked: 263 times
Tom wrote: Sat Jan 07, 2023 1:46 pm Looking great. I love watching other people work on cars. So much easier than working myself. :lol: :angel: :lol:

What's the end-game for that car?
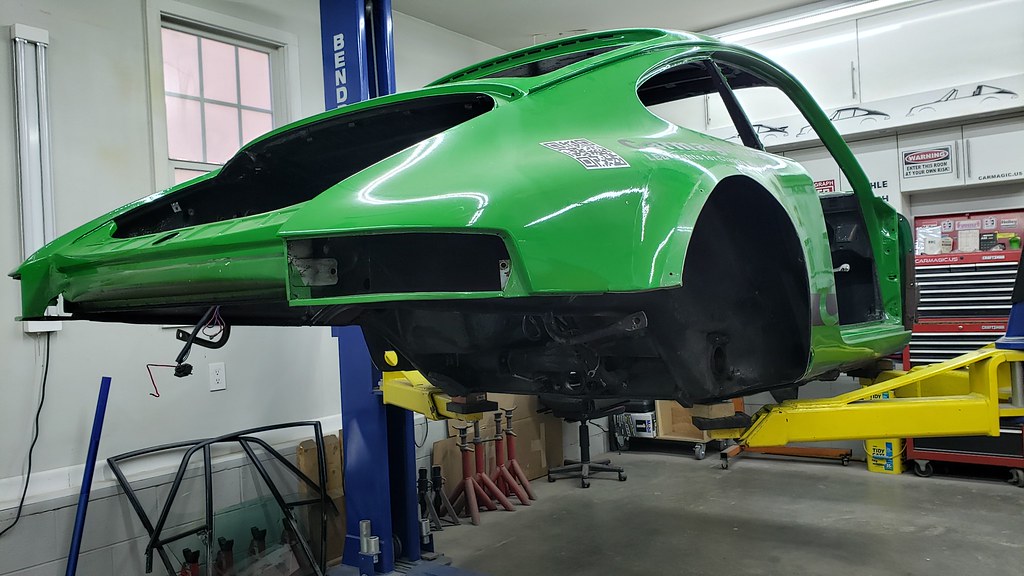
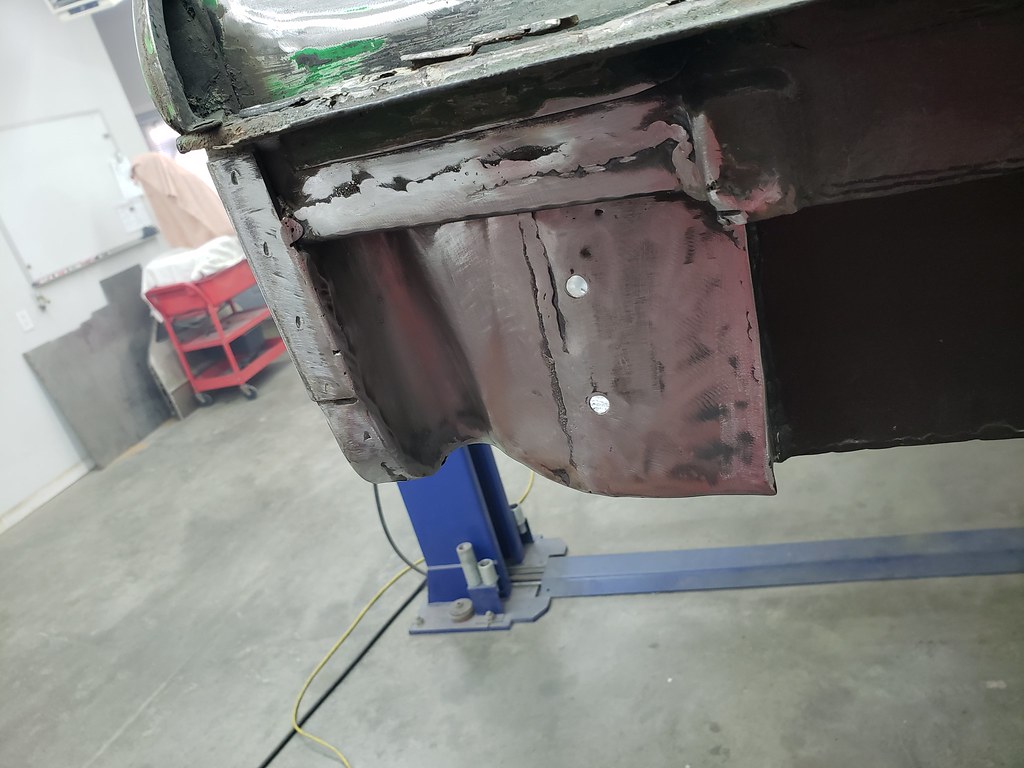
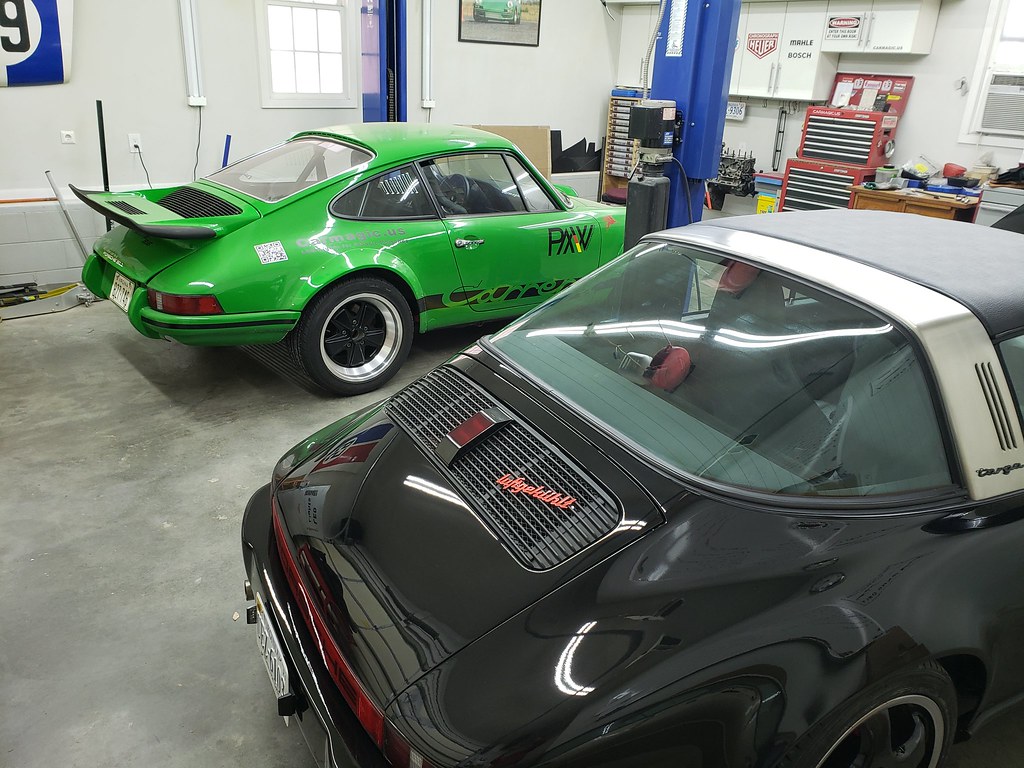
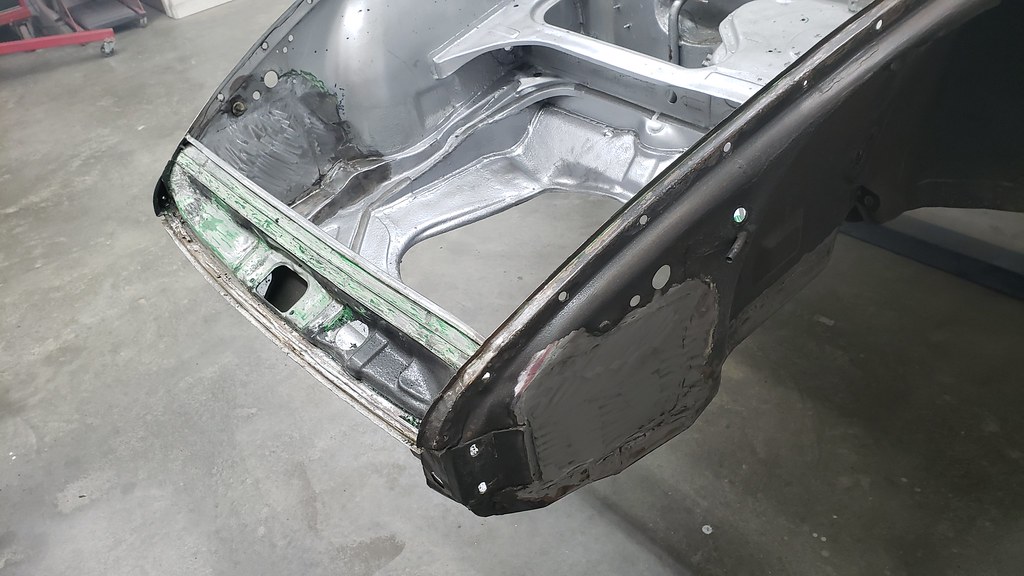
It will be a street car, an outlaw type Restomod, or whatever it's called.

Next in line is to delete the battery boxes, since the battery was relocated in to the smugglers box. This will also free up some space for additional oil cooler or so.

Image

Image

Image

Image

Image

Image

Image

Image

The nose panel need also some work. Back than when I butchered the car for Autocross, I just used some body filler to make it look OK.

Image

There will be new lip piece installed, the rest underneath is still solid, just a bit banged up.

Image

I will fix this. Since I have the section for the air flow for the oil cooler, it made no sense to replace the complete nose panel. I would have to cut out that section again.

Image

Removed the brace plate behind the lock and will clean it up and bang straight and weld back in.

Image

At this point most of the top section is straighten out. Just waiting for the lip piece to come in so I can cut out the old and replace it.

Image

To be continued
Engelbert
LED lights for classic Porsches http://carmagic.us/

#4

User avatar
audi4t
Posts: 473
Joined: Sat Jan 29, 2022 10:34 am
Location: Georgia / Connecticut
Has thanked: 385 times
Been thanked: 298 times
Great job !!!
2024 - 911 Carrera Coupe Arctic Grey (Aerokit)
2023 - 911 Cabriolet Shark Blue / Blue Top (Traded)
2022 - 911 Carrera Python Green (Traded)
2008 - BMW 135i Cabriolet Satin Yellow Vinyl Wrap / Black Top

#5

User avatar
Tom
Site Admin
Posts: 8912
Joined: Fri Jun 25, 2021 2:04 pm
Location: Silicon Valley, CA
Has thanked: 931 times
Been thanked: 3988 times
Contact:
Very cool! Thanks for sharing your progress! Shameless plug, there's and article in the most recent Panorama I wrote called "Built from the Heart" about an over-the-top "outlaw" 911 with lots of unique features worth seeing. I went with the flow and referred to it as an 'outlaw' too, but the term was pretty ironic given how far the owner went to ensure the car was fully street legal. :think:

Re your car, I'm looking forward to seeing how you stuff that 944 motor into the 911 chassis. ;)

#6

User avatar
JetFuelOnly
Posts: 128
Joined: Tue Jul 06, 2021 8:06 am
Has thanked: 43 times
Been thanked: 122 times
I'm enjoying this, keep up the posts!

#7

User avatar
Carmagic
Posts: 230
Joined: Sat Dec 17, 2022 1:29 pm
Has thanked: 33 times
Been thanked: 263 times
Tom wrote: Mon Jan 09, 2023 7:59 am Very cool! Thanks for sharing your progress! Shameless plug, there's and article in the most recent Panorama I wrote called "Built from the Heart" about an over-the-top "outlaw" 911 with lots of unique features worth seeing. I went with the flow and referred to it as an 'outlaw' too, but the term was pretty ironic given how far the owner went to ensure the car was fully street legal. :think:
I read it, it's a real cool car. However, I did not see much what they did them self, it looks to me that all the work was done by some else.
Tom wrote: Mon Jan 09, 2023 7:59 am Re your car, I'm looking forward to seeing how you stuff that 944 motor into the 911 chassis. ;)
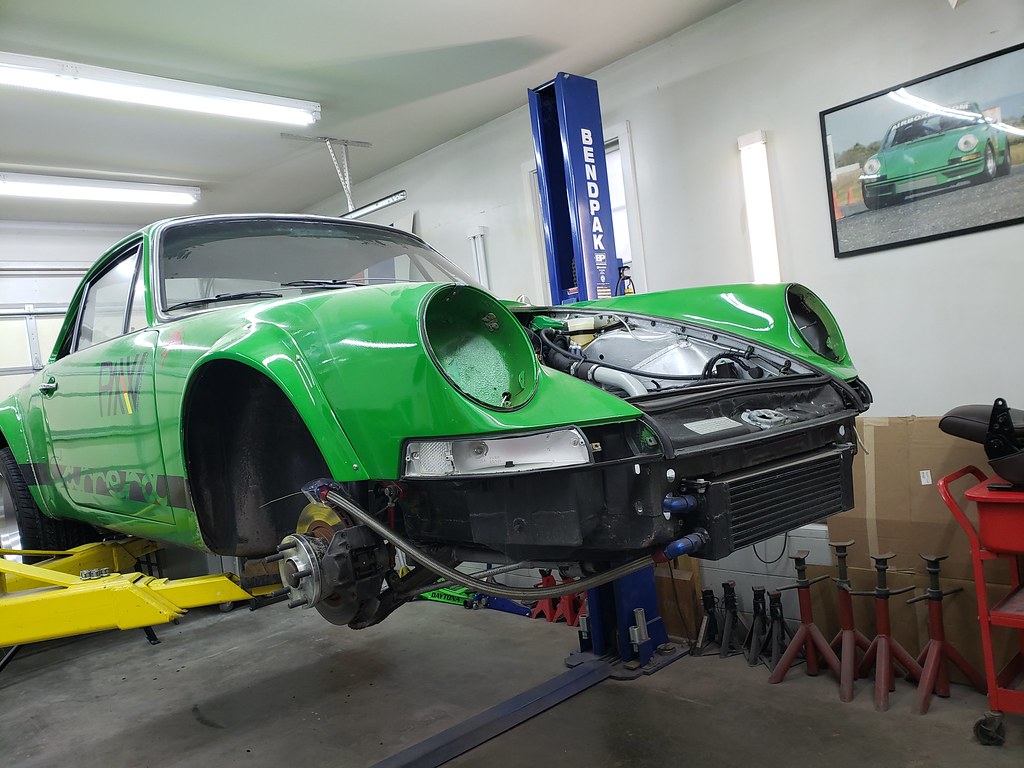
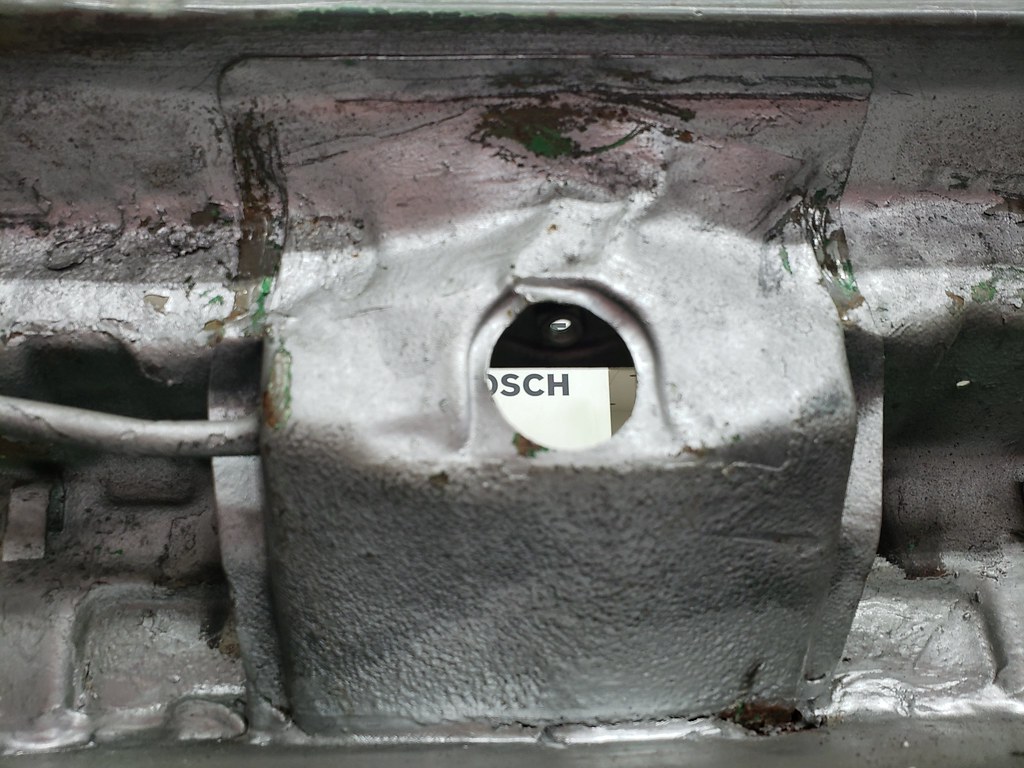
This is actually the engine which will go in the 71.
Image

That engine is currently in my 84 Targa, until I got the 3.2L engine done for the Targa.

Image

Maybe I should post some high-lights from the Targa built. I may do it in a separate section.

Cheers
Engelbert
LED lights for classic Porsches http://carmagic.us/

#8

User avatar
Carmagic
Posts: 230
Joined: Sat Dec 17, 2022 1:29 pm
Has thanked: 33 times
Been thanked: 263 times
More work to the front section. The section where the oil cooler is located needed some modification. One of the oil line was routed in to the trunk and out again through another hole in the battery box. Since I deleted the battery boxes, I modified the section where the oil lines will be located. Here are some pictures.

The large hole at the left was for the upper oil line.
Image

I cut a piece out.

Image

Fitted in a new piece.

Image

Image

Test fitting the oil cooler and lines.

Image

On the suspension pan, I had some overlap from back than when I replaced it. So I cleaned this up and removed the overlapping section.

Image

Image

I found some rust around the cross member mount.

Image

I decided to remove the section to see what's going on.

Image

Here is one of the mounts removed. I got new ones for both sides.

Image

I saw from the inside of the smugglers box some light shining in through some small holes, so I removed the gravel guard of that section.

Image

From the inside there was also some rust and the bottom of the vertical metal was rusted, so I cut out and replaced it with a new piece.

Image

Image

From the outside.

Image

Here all finish welded in.

Image

Next, the bottom section of the smugglers box.

Image

Cutting out some rusty metal until its good material to weld on.

Image

Making a separator piece (or whatever it's called)

Image

Welding in the new outer piece, I also deleted the hole which had a round cover mounted. This just simplifies things.

Image

Finish

Image

Here a view from inside.

Image

To be continued.

Cheers
Engelbert
LED lights for classic Porsches http://carmagic.us/

#9

User avatar
Carmagic
Posts: 230
Joined: Sat Dec 17, 2022 1:29 pm
Has thanked: 33 times
Been thanked: 263 times
Continue on the support pieces for the cross member. I cleaned up the section and welded in some reinforcement pieces, and welded in the support.

Image

The driver side was actually very solid. Looks like there was moisture in the smugglers box and that's why the right side just rusted away over the years.

So I cleaned up the old weld and added some additional welds.

Image

There were also a few holes drilled in the trunk area, so I closed them as well.

Image

Image

There are always some little holes.

Image

Here I just cut out some old material.

Image

And welded in a new piece.

Image

I decided to add some reinforcement to the sway bar area.

Image

Image

Image

Same thing for the other side.

My new lip piece came in, so I drilled out the old spot welds.

Image

Image

Cleaned up that section and got it as straight as possible.

Image

Fitting in the new piece.

Image

Here is it complete welded in.

Image

Also cleaned up some more in the trunk area.

Image


Cheers
Engelbert
LED lights for classic Porsches http://carmagic.us/

#10

Post Reply